Showing posts with label Health & Beauty. Show all posts

Wednesday, February 21, 2018

Juvia's Place Review Pt.1 - The Zulu Palette Review & Swatches

Hey lovelies!

Soooo excited to show you guys the Zulu Palette from Juvia's Place - an affordable, pigmented, beaut of a palette featuring nine very daring shades. The palette is a thin, holographic cardboard-type packaging. It doesn't have a mirror, but to be fair it's a much more affordable palette for it. It includes three metallic shades, and six matte colours, perfect for those more prone to colourful eye looks (like me!)

Juvia's Place is cruelty-free, vegan indie brand, known for having gone viral on Instagram for its' focus on eyeshadows that really pop on POCs, though of course eyeshadows can be worn by anyone!

Take a look below for swatches, colour details, performance review and price details!


As you can see, the palette has a gorgeous design, and though my camera clearly didn't pick it up, the lightweight, sturdy cardboard is actually a pink-hued holographic!


Swatches of all 9 shades on low light!
Swatches of all 9 shades in bright light!

As you can see, these eyeshadows are sooo pigmented - though there is a huge difference between the matte and metallic shade formulas - the metallics are buttery, velvet-feeling and pigmented like no others. The mattes, on the other hand, are a little less pigmented, and very hard-pressed, but in a way I kind of prefer this, as there's no fallout, and they are very very buildable.
Now, there's no shade names for this palette, unlike other Juvia's Place palettes, but evidently from the photos, the shades are - A matte orange, matte yellow, matte brown not unlike 'Cocoa Bear' from Makeup Geek, a matte blue not unlike 'Mochi' from SugarPill, a metallic bright green, a metallic sky blue, a metallic rose gold duochrome, a matte dark pink similar to 'Passionate' from MAC, and a deep matte purple.


This palette is available in the US from Juvia's Place for only $17.50, and available in Europe from BeautyBay for only €23.20  - Click here to buy from Juvia's Place - Click here to buy from BeautyBay!

Below are some looks I've tried out with the palette lately - more to come of course on my instagram @Crumble_Newman!

Enjoy!


Adios,

Crumble x


Wednesday, September 07, 2016

My MAC Eyeshadows - Review and Swatches of 6 Shades!


Heya lovelies! 

So, thought that I'd complete the swatches of my single pan eyeshadow collection by showing my MAC shadows - so far, I only have 6 shades. To be honest, I've never really been a MAC fan until recently - I'm used to the soft, buttery texture of Makeup Geek eyeshadow pans, and though MAC eyeshadows are also great in their own right, I did have to get used to the difference in application and texture. But, this is a small price to pay for the range of colours and the accessibility! 

Some MAC shadows are a little hit and miss, to be perfectly honest. It's generally a good idea to test the shade on your hand before you buy, because some are very opaque. some incredibly sheer. They generally have a dryer feel to them than Makeup Geek shadows, though this can actually serve you well, as you have more control over how much you pick up on your brush.

I bought my first MAC eyeshadow, 'Cheer Me On', a matte orange, earlier this year, on a whim. Really, I should have waited to buy it, because recently MAC have lowered their prices for eyeshadow pans - meaning if you buy eyeshadows without that little black plastic thing around them, and instead stick them in a magnetic palette, such as a Z-Palette or MAC's own palettes, they are now only €7. I think buying them this way is definitely the way to go - it's easier to travel with, it looks damn nice, and you're not wasting as much plastic!


So, without further ado, here are swatches of my MAC collection so far!

I'll start with my shades - first up we have Stars N' Rockets, and shimmery pink shade with blue reflection. I absolutely adore this shade, it looks so galaxy-like. 
Then we have Cranberry, one of their bestsellers, and for good reason! This is a shimmery copper/maroon shade that looks good with all skintones and eye colours.
Then there's Club, a duochrome brown and green shade I love, it appears brown on skin, but when light hits it, it reflects green!


Then we have my matte shades - starting with Cheer Me On. This is a matte pure orange colour, perfect for pairing with maroons or browns. 
Passionate is a matte mid-toned pink, perfect for a pop of colour on your outer-v. 
Last but not least, we have Electric Eel. Perfect paired with Stars N' Rockets, this is a matte electric blue, I adoooore this shade, though it's not for the faint-hearted or makeup-shy!


So, that concludes the swatches of my current shadow collection - I'd love to hear thoughts on what tutorials I could do next, so feel free to leave a comment below if you'd like to see an eye look with any specific colours!

'Till Next Time,

Crumble X

Monday, September 05, 2016

Makeup Geek Review and Swatches of 15 Eyeshadows!

Heya cuties!

So, very late coming (Sorry, exaaaaams, holidays, work, madness!) but finally decided to do my Makeup Geek review - a little background info here, Makeup Geek is a California-based company, founded by Youtuber Marlena Stell (she's the best!), providing some of the best eyeshadows I have ever used in my life. These eyeshadows are generally vegan, cruelty-free, and talc free, which is sooo rare. Honestly. In my opinion (controversial!) these are better than Mac. Really, I do think so. The pigmentation is amazing, buttery, long lasting, and the colours are just beautiful.

So, in December I decided to invest in a nine-colour palette - each eyeshadow pan is $6, and they're sold as a single eyeshadow, to be put in a Z-Palette, which I bought (holding 9 shadows) for $14.99.

Then, this month, I decided to buy more (just couldn't get enough!), so I went ahead and invested in another six eyeshadows, a contour pan, a blush pan, and a Makeup Geek travel vault palette ($13.99) to hold them in.

Then, my friend Vanessa decided to buy me a large sky blue Z-Palette, and another shade - Lemon Drop, a beautiful shimmery yellow shade.

The contour shade I bought is called Break-Up, a cool shade for porcelain skin tones, and the blush pan is a coral-pink shade called Bliss. Both the contour and blush pans are really pigmented and easy to blend, and are larger than the eyeshadow pans (4.25g as opposed to 1.8g).

So, what shades of eyeshadow did I myself eventually purchase?


- Cocoa Bear (a gorgeous matte warm-toned chocolate brown)

- Shimma Shimma (a shimmery pale shade, perfect for highlighting)

- Vanilla Bean (a nude cream colour, with very subtle shimmer)


- Peach Smoothie (a peach yellow-toned matte colour)

- Creme Brulee (a light brown matte sandy colour)

- Latte (a medium matte brown colour)


- Bedrock (a medium matte grey, with brown undertones)

- Desert Sands (a warm matte yellow-toned brown)

- Preppy (a matte khaki with brown undertones)


- Dirty Martini (a matte olive green colour)

- Bitten (a matte deep burgundy colour)

- Lemon Drop (a shimmery bright primary yellow colour)


- Tuscan Sun (a matte dusty salmon pink colour)

- Poppy (a bright matte orangey-pink colour)

- Steampunk (a shimmery duochrome with both copper, black and blue undertones)


So as you can see, the eyeshadows are sooo pigmented and believe me, the photos don't do the amazing colours any justice. These eyeshadows come in over 130 shades, in a variety of finishes - matte, shimmer, duochrome and foiled. And Makeup Geek have another 19 shades being released in the next couple weeks - I won't be buying them from Makeupgeek.com anymore, unfortunately, but I will try to get my hands on a few shades. Being based in Ireland, the customs and the shipping times are just not worth it from their home site for me - but Beautybay.com stock both Makeup Geek and Z-Palettes, and it's free shipping to Ireland on purchases over €18!

The eyeshadows retail for about €6/7, and Z-Palettes vary in price from size to size, from €8 to about €20

Anyways, till next time,

Crumble X


Wednesday, March 23, 2016

Glossybox March 2016!

Heya m'darlings!

So, was thinking it would be good to do reviews of every month's Glossybox, just to get back into the routine of posting, and so that anyone who doesn't get glossybox, and is maybe on the fence about it can maybe make up their minds based on reviews!

This month's box was called 'Get Glowing', and I have to admit, the box certainly stayed on point for this title! So, let's look at what we got for March -


We got an angled contour brush from Luxie, a sample of Olay Regenerist perfecting cream, -417 Mineral Shampoo and a Conditioner, Hey Honey facial serum, and a So Susan Light Diffuser.


First up we have the -417 Catharsis Vitamin Mineral Shampoo and Conditioner. These are actually travel size, which normally would annoy me but I got a full size conditioner mask last month with Glossybox so I suppose I shouldn't complain. These were both actually great, a really nice fresh smell (they're made from Dead Sea minerals), left my hair really clean-feeling and moisturised, and probably have about 3-4 uses in them. 


Then we have the two skincare items, We got a sample of Olay 'Regenerist Perfecting Cream', first of all, which is alright, but not great - it's a very small sample, and it's just not for me, so I'll probably give it away to a relative. Then we have the Hey Honey 'Good Morning Honey Silk Facial Serum', which I ADORE. It smells great (honey, mmmmmm) but this is a sample too. I'll probably invest in the full size now though! Moisturising, without being oily, and great as a primer.
Get them here - www.heyhoney.com, and /www.olay.com


Finally, we have my two favourites this month - we got a Luxie Rose Gold 'Large Angled Face Brush', first, which is just GORGEOUS and soooo soft, I adore it, it's perfectly shaped for contouring or highlighting, which you can do both of with So Susan's 'Light Diffuser', the last product for this box. I really like this, despite being a little too warm-toned for me. This is a gold-toned highlighter and matte bronzer duo, and OHMYGOD, the scent! It's scented with cocoa powder and coconut, and I swear it smells amaaazing. 


I lightly swatched them both there, so you can see that it's a warm chocolatey tone, and a lovely gold-toned highlight. This will be so nice to give a good glow to skin in the summer, for sure!
Get them here - sosusan.com and /www.luxiebeauty.com

So, this month's box was really nice, in my opinion - all of the products were connected to March's theme, and the worth of this box came to around £65, and considering Glossybox costs only £13.25 a month, I 100% feel like it's worth it every month to have a little surprise present to myself!

Glossybox Subscription - click here!

Anyways, 'till next time,

Crumble X

Thursday, November 05, 2015

Benefit 'Roller Lash' Review


Heya m'darlings!
I haven't done a review of anything in a while and people have been asking when the next one is - so, I have a good few in store - I'll be doing a new review once a week for the next couple weeks, so here goes my first of the month!

 So, after a couple years sticking to 'They're Real!' by Benefit and Max Factor's False Lash Effect mascara, I decided to try out Roller Lash this month, as I'm getting lazier and lazier, and less inclined to bother with an eyelash curler. This mascara claims to grab, separate, lift and curl…while the instant curve-setting formula holds for 12 hours. The packaging itself says that it "visibly lifts lashes gives long-lasting curl - eyes look more wide open!"
 The packaging is lovely, actually, with all it's claims bravely displayed along it's side. The outside of the mascara is black and pink, lightweight and very durable.
The brush itself is a pink rubber bristle brush, with small hooks on one side to catch small/bottom lashes, and the brush is curved to curl your upper lashes.


Now, the important part - what does it look like on?


Okay, so this is me with no makeup - don't judge! As you can see, without mascara, my eyelashes are non-existent. 
So, this is the before picture...


And this is the improvement after just one coat - so, personally I wouldn't wear this out for a night, because there's no volume really, but for everyday, this mascara is just perfection for a natural, open-eyed look! No clumps whatsoever with the first coat, but that does become a problem after the second and third coat...


After a second and third coat, lashes become a little clumpy and spidery - so I tend to stick to just one coat, unless I have a lash comb handy to fix the spidery bits.


Benefit's Roller Lash mascara is available at Brown Thomas, the Benefit website itself, or Boots for €26.00, and as far as I can remember there is also a mini version now available in Boots for a handy stocking filler, or even if you just want to try it out for a while!

All in all, a great buy, easy for everyday use, and I definitely prefer it to They're Real. Worth the money!

Anywho, 
Adios!

Crumble X

Tuesday, August 11, 2015

W7 In The Mood and Night Glow review!


One of the fastest growing makeup brands in popularity here in Ireland these past three years has to be W7. Cheap, cheerful, and oftentimes, pretty good luxury dupes - the most famous being their dupes for the Urban Decay Naked palettes, retailing at only €7, as compared to the high-end price of €47!
I've bought my fair share of W7 make-up, but today I'm going to review my favourite two recent products from them - "In The Mood", a dupe for the Naked Basics palettes with 5 matte and 1 shimmer shade, and "Night Glow", a pink-toned highlighter, an alright dupe for Benefit's "High Beam".

(L-R) Shrimp, Oops, Venice, Wink, Katie and Cargo.


The first shade of the In The Mood palette is "Shrimp", a highlighter shade that goes on smoothly, doesn't cake, isn't tooooo sparkly, and has a yellow tone to it. I do love this shade, it's the best eyeshadow I've used for highlighting the inner corners of my eyes!

The second and third shades, "Oops" and "Venice" are both nude matte shades, the only difference being that Oops is yellow-toned and Venice is pink-toned. Both are highly pigmented and smooth to blend.

The fourth shade, "Wink" is the only shade I don't like here, as it's not very pigmented, and doesn't even tend to show up on my skin! I had hoped it would be similar to the "Tease" shade in the second Naked palette, as I've run out of that one, but no such luck.

The fifth and sixth shades are the darkest - "Katie" is a caramel-brown shade that I love, it's matte, very pigmented and a gorgeous colour.
"Cargo" is a smoky (almost) black colour, and is matte also. 


The second product I bought was the new "Night Glow" highlighter - swatched above the palette shades. It's a pink-toned liquid highlighter, not as subtle as High Beam or a powder formula, but for €3 it's good, it blends out nicely and is versatile.


Overall, I think you can't go wrong with the palette, as 5 out of 6 shades are good quality, and the whole thing is only €4! It's perfect for subtle daytime make-up, and I'll definitely be using it some more.

Subtle daytime make-up look with the "In The Mood" palette.


Buy W7 "In The Mood" palette here
Buy W7 "Night Glow" Highlighter here

Anywho,
Adiõs, Crumble x

Thursday, August 21, 2014

Everyday Gold, Brown & Burgundy Eyes Tutorial


I've decided to persevere with making these tutorials, and whilst I still don't have the balls to attempt a 'going-out' look tutorial yet, I did decide to do this everyday gold and burgundy one, because I feel as though people seem to think that once you add anything but browns, greys and black to an eye it's outlandish and can't be 'everyday' look. 
Well, let me prove you wrong, dear reader. Adding colours in a subtle way to a smoky eye can look pretty down-to-earth, and does NOT have to look garish! 

Rant over, and on we go.


1. Prep the eyelid, using primer or a dab of foundation.

2. Using a pale cream eyeshadow, go over the eyelid again - making sure you have an even, pale, matte surface. This will make other eye shadows more vibrant on your eyelid, and so you will have to use less product!
Smooth over eyelid with a fluffy brush.
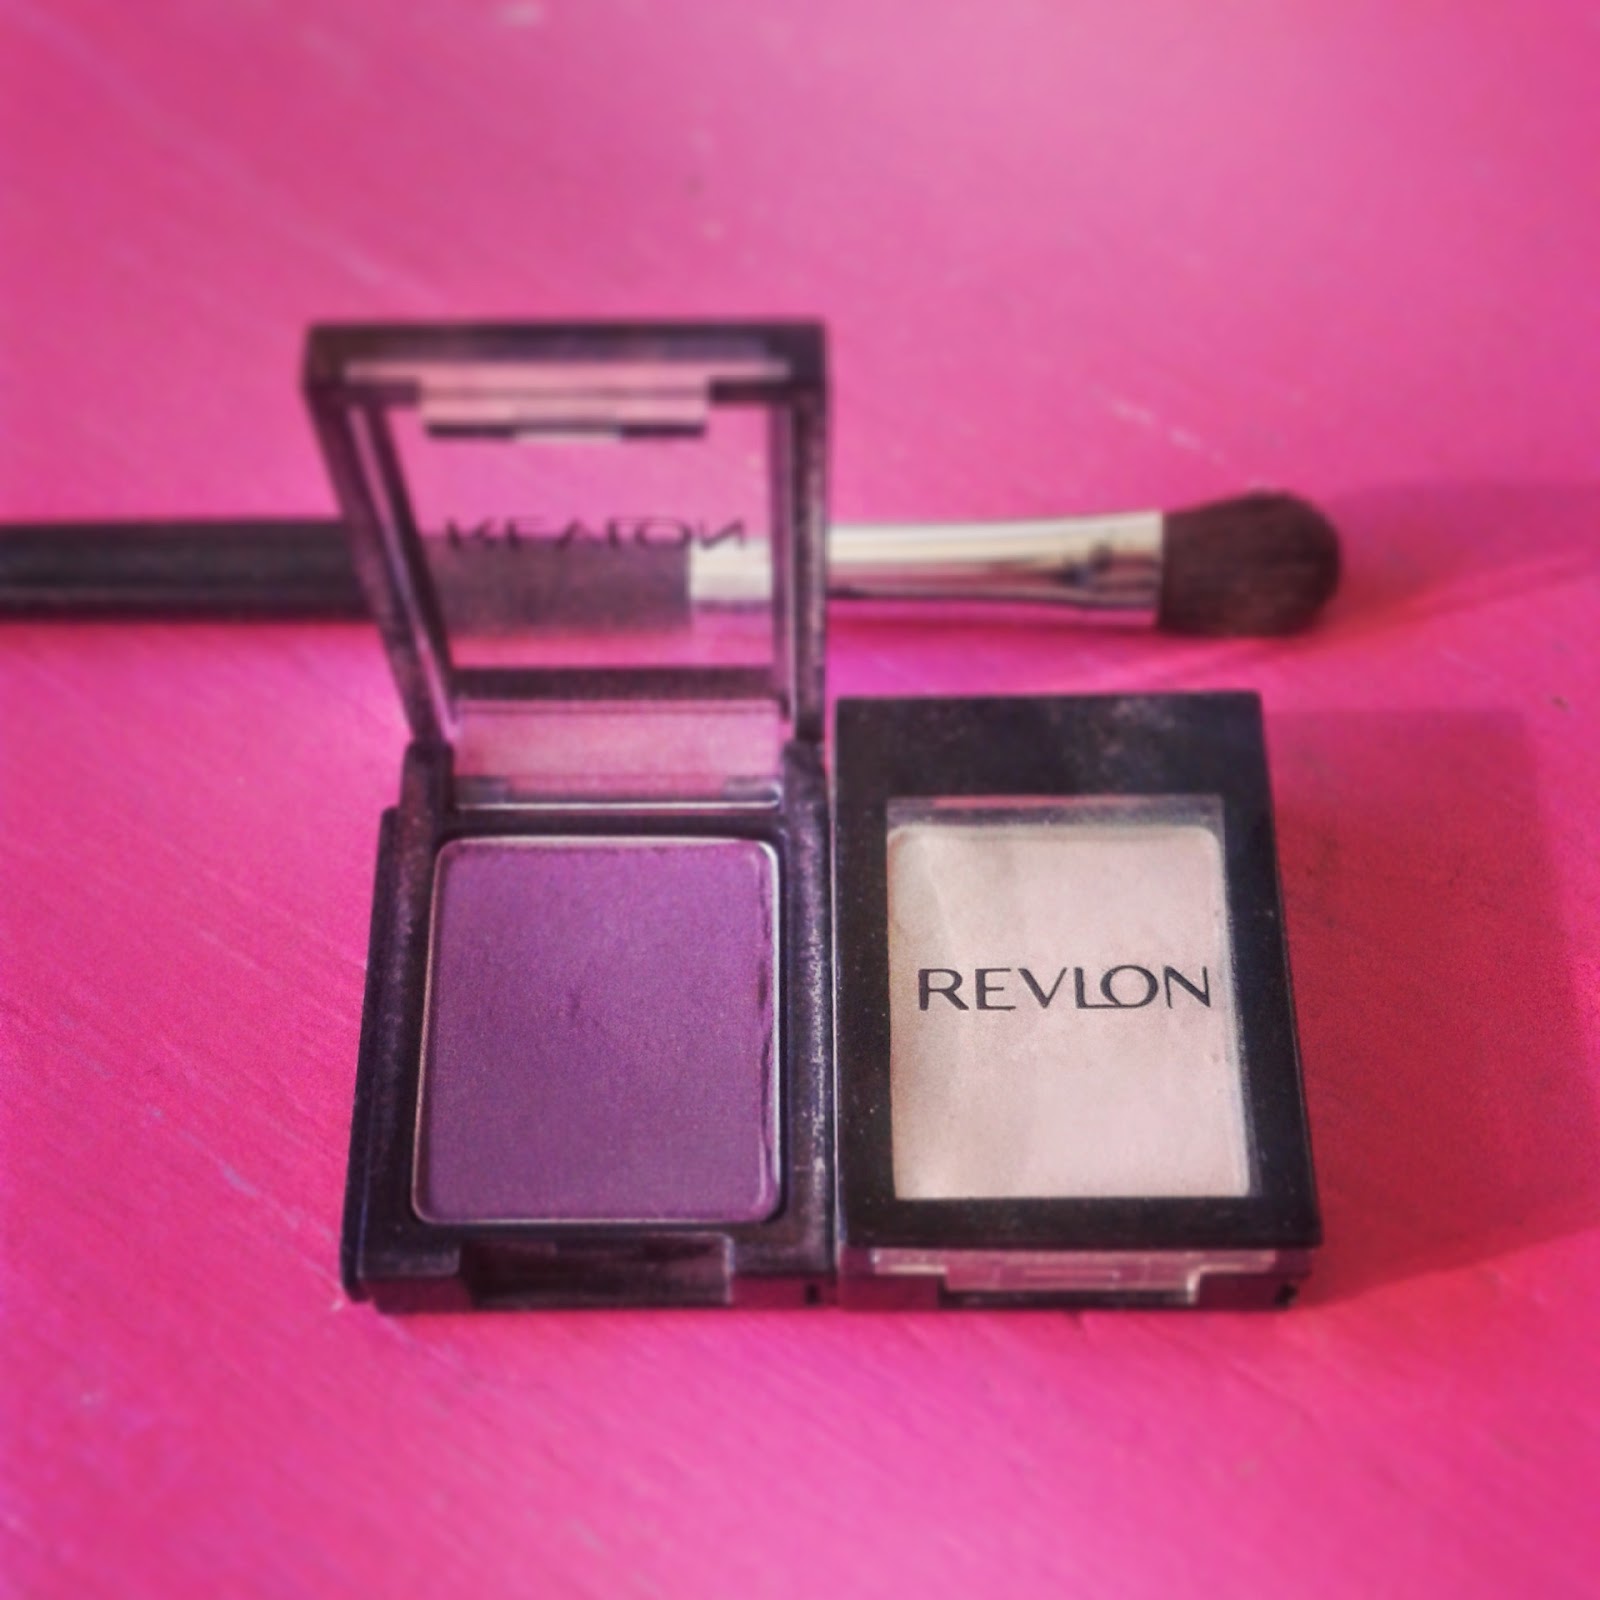
I used 'Bone' by Revlon. (pictured right)
     

3. Highlight! Using a highlighter shade (I used Urban Decay's 'Bootycall'), dab onto the middle of the eyelid, the brow bone, and the inner corner of the eye. Blend well!

Dab into these three areas to give the eye a more 3D, natural effect.
4.  Using a dark, matte brown shade, drag the brush along the outer edge of your lash line, to elongate and contour the eye.


I used the darkest brown shade I could find, from a New Look
palette. Any dark brown will do, as long as it is matte!
5. Add gold eyeshadow. I like to get a small brush, load it up with pigment, and gently cover most of the eyelid, not going higher than the crease of the socket.
I used 'Half Baked', from the Naked 2 Urban Decay Palette.
6. Gently add burgundy. Next, with a clean brush, blend your burgundy shade into the outer corner and slightly up into the crease of your eye. My burgundy shade is extremely pigmented and this is a daytime look, so I only used a little, but you can use as much as you'd like!

I used a Deep Burgundy shade from my No.7 palette.
7. Add your finishing touches!
Since my eyes are quite close together, I often use looks like this one, with a bright inner corner, to make them seem farther apart. For maximised effect, only line the outer corners of the eye, and leave the inner corners bright! Add a coat or two of mascara on top (I used Max Factor's 'False Lash Effect' in Brown), for big-looking eyes line the waterline with a cream eyeliner, and you're good to go!


So, I hope you had as much fun using this tutorial as I did mucking about with all my makeup. The next tutorials I'm going to start making are going to be focused on what colours to use for different eye colours - that means I shall be recruiting volunteers! Stay tuned!

Until next time,
Crumble X


Follow me on Instagram! - instagram.com/crumble_newman


Tuesday, August 19, 2014

Brown & Purple Eye Makeup Tutorial


So, I've gotten one or two people asking me why I don't try a makeup tutorial - So I decided to gladly obey, and try, at least. Bear with me, It is my first time!
I decided to use one of my every day smokey eyes for this one - the purple is surprisingly subtle, and gives the brown a nice mauve-y effect. Enjoy!

1. First of all, prep the eyelid. Use a small bit of foundation or primer, and smooth over the eyelid. 

2. Using a pale cream eyeshadow, go over the eyelid again - making sure you have an even, pale, matte surface. This will make other eye shadows more vibrant on your eyelid, and so you will have to use less! ('Tis a good tip, I'm proud of myself)

I used - 'Bone' by Revlon
3. Using a taupe (or light brown shade), apply to the crease of your eye - to find the crease, just follow the shape of your eye socket. This will make the shape of your eye more pronounced. If you have very small eyelids, or very covered lids - you can place the crease a little higher.

I used - 'Tease' by Urban Decay
4.. Apply a purple shade to the outer corner of your eye. I used a really nice one, Matte Plum by Revlon - my favourite thing about these single eyeshadow compacts is that you buy them seperately and they click together to make your own palette. Love it!
Revlon 'Plum' and 'Bone', both new matte shades.
5. Apply a wash of a warm brown shade to your eyelid. I used this warm brown shade from a No.7 palette!
No.7 palette - I used the middle brown shade across my eyelid.
6. Blend! Get a clean, larger eye shadow brush and blend the top of your eyeshadow, bringing it over and back like a windscreen wiper. Blending is really important, as any unblended eyeshadow can have stark, obvious ending lines.

Blend up and out - you want to lift and elongate the eye!
7. Highlight! I used Naked 2 Palette's 'Bootycall' shade to highlight. 
I get asked this a bit, so I shall explain - as you've contoured your eyelid with a taupe shade in the crease, you also need to highlight, to give your eyelid emphasis and a 3-D effect. Place a small dab of highlighter shade (or a white eyeshadow will do the trick) on the middle of you eye lid, on your brow bone, and in the inner corner of your eye.


Don't forget to blend the highlighter lightly!
Naked 2 palette - I used 'bootycall' and 'tease'
8. Add your finishing touches! 
A coat or two of mascara (I used No.7's Extreme Length, and Rimmel's Scandaleyes) and a flick of eyeliner, and you're good to go!


Ta-dahh! Hope you enjoyed my first attempt at a makeup tutorial, here's hoping I do better next time.

Adiòs,
Crumble X